Migrate WordPress without a headache!
Migrating WordPress seems to be a difficult and cumbersome job for many website owners. The risk of losing data is big, when the data is not exported in the correct way, they think. But it can be a lot easier. You will not need any other plugins, new installation on new hosts and such problems. The only thing that is needed, is using a database export with phpMyAdmin.
After migrating WordPress, you might need to change some variables in the configuration of WordPress. This can be done easily by either editing the configuration file by changing and adding some temporary lines of code, or by changing two variables in the database configuration in phpMyAdmin. If you’ll keep the same domain name and website address, not changes are needed. In that case, only some export and copying files comes around the corner. In this guide we will closely guide you through the process. The idea is to transfer WordPress sites, without any downtime. This means you would rather need to copy your website and database, instead of starting a new WordPress installation on the new host and then rolling back the settings and posts. The advantage of our method, is that you can easily migrate your websites without any downtime. All you will need to do, is following the steps in this guide. Migrating your website can be done in somewhat twenty to thirty minutes using this manual.
Read only?
If your website is not really active, you could just start copying your website folder and database and set it up on the new webhosting server. In case your website does have many visitors posting new content every single minute, it might be more complex to achieve the same. In this case, you could consider putting your website into a short read only mode. This means that changing settings, adding posts and commends et cetera can be temporarily disabled. That way, the content will not be changed while you’re busy with your maintenance.
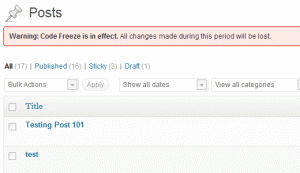
Unfortunately, WordPress does not have an own feature to disable content temporarily. WordPress does have an option to put your website to ‘website maintenance’, but that would mean a full temporary downtime on the website. A better idea is to keep the content on read only, but not being able to write or change the content. This could be done by using a third-party plugin called Code Freeze. It temporary disables adding, editing and deleting new content. Also, you are not able to change any plugin, except for Code Freeze itself. So, if your website is being updated a lot, you could use Code Freeze. If your website has just some visitors and not that much interaction, you could skip the step of putting your website into a read only mode.
Make an export of the database
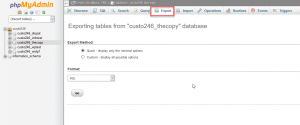
Now typically shared webhosting and hosting control panels such as DirectAdmin, cPanel and Plesk offer the possibility of logging in to a system called phpMyAdmin. phpMyAdmin is a webbased program on the server that offers access to the database. What we will be doing today, is logging in to the database and export it. So, log in to your control panel and then click ‘database’, ‘phpMyAdmin’ or such references. Once you logged in to phpMyAdmin, you could click the database and then press the Export tab.
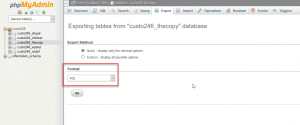
Another way of doing it, is using plugins such as Duplicator. To avoid having to use tons of plugins to achieve the same thing as we are doing now, is by just exporting the database. Click the export tab and then choose for ‘fast – just show the most important options.’ Keep the content to ‘SQL’ and just press start. A tgz or sql-file will now be exported and downloaded to your computer.
Please note: you might need some patience, depending on how big your website is. Also, only text and settings will be included in the database copy. Files such as images will not be copied. You will need to do this yourself after importing the database to the new server. We will explain later in this guide how to move files.
Importing the database to the new server
Now, first you will need to create a new database on the new server. Again, open your control panel and create a new database. How this can be done, depends on the panel that you are using. Then, log in to the new database using phpMyAdmin again and click the database.
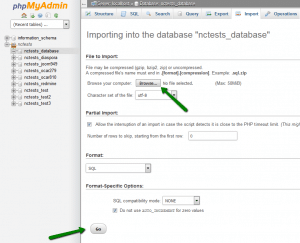
In the previous step we have clicked export, now we will click the tab next to it called ‘import’. There are some settings already checked. Please, just keep the settings the way they are. All you’ll need, is to upload the SQL-file you’ve generated in the previous step. Please note: check the maximum size. Some hosts have a maximum size of 64MiB. That means if the file is bigger, you will need to change the maximum filesize in the PHP-settings. If you have shared hosting, you should contact your host about it.
Then press ‘start’ and wait till the database has been successfully imported.
Downloading the WordPress files
Now, you will need to download the full WordPress site from your current host. Most control panels offer a way to use the FTP function. So, head over to the info you have received from your webhost. Sometimes, it is possible to create your own FTP-account and password so that you could login to the FTP server directly.
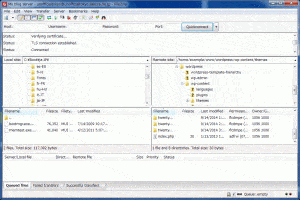
A good program to use to download your website is a FTP client like FileZilla or CyberDuck. Download your files to your hard drive. Please note: you will have to copy all the folders and files. This means, also your media gallery will be downloaded to your computer. Before doing this, make sure you have enough disk space available on your computer.
Uploading the WordPress files
Once you’ve downloaded your website files, it’s time to upload them to the new hosting server. So, you will need to create a new FTP account on the new server and login again. Open the folder where you have saved all your files you’ve just downloaded. Then upload them to the new server and wait a bit.
DNS records
Now the fun part starts. We will want to change the DNS records, but before doing that, we will have to check that everything is working perfectly. This is the part that most users seem to forget or have a hard time with doing it. The problem is when you do not check your DNS records before changing the nameservers, your website eventually could experience downtime. So, there should be a way to test if the website is working correctly, before making the changes definitive.
If you just move your website from server A to server B, you will not need to change any settings in WordPress. The reason is that your domain name and folder will stay the same, but it will be just on an other server. This way, you won’t need to change any URL’s or other variables in the configuration or database. What you will have to do, is change the MySQL-settings in the wp-config.php file.
Check your wp-config.php file and use the new database information you have created to import the database. Be careful with the passwords, so make sure you really took all the information in a correct way and filled them in at the wp-config.php file. Once done, re-upload the file to the new server and overwrite it.
Now it is time to check if everything works the way you are expecting it to work. Now this is the step where many site owners make a big mistake. Most of them just change the nameservers at the domain registrar and see if there are any problems. This is not the correct way to do it. Before making changes to the audience, check if everything went correctly. To reach the site on the new server, whilst everybody else still can see the site at the old server, you’ll need to make some changes to your DNS-settings on your computer.
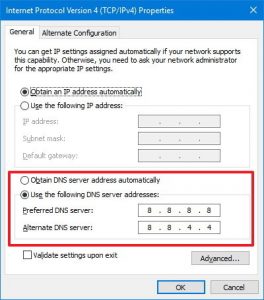
On Windows, go to the Control Panel and head over to the network section. Click the network adapter and go to Properties. Now you’ll see a possibility to fill in DNS servers. You should fill in the IP address of the new server as a DNS server and then check in your browser if you can see your website. If everything is all right, you can now transfer your website with your domain registrar.
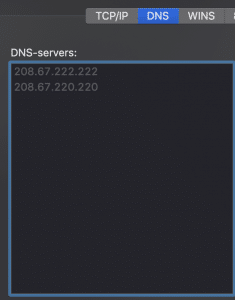
On a Mac, go to your settings and then press ‘network’. Click ‘advanced’ and then select the DNS tab.
In case there are issues, like “Error connecting to database”, please check the database settings. Please note: while using these DNS settings, you are not able to visit other websites rather than the websites that are hosted on the new server. Fix the issues and then revert the DNS info.
Changing the nameservers
Now you’ve made sure everything is working okay, you can change the nameservers. Please note: it will take up to 24 hours at some hosting providers before the changes are visible. At first, check the info you have received from your new provider. In most cases, they will state which nameservers can be used. Head over to your registrar and change the nameservers accordingly to the information you have received. Now the waiting game starts. After a while, you can visit your website at the new server.
Changing the Site URL
Did you not only migrate the site to a new server, but did you also change the full website url? Then you should change the site URL in the settings. The way to archieve this, is by going to the wp-config.php file again and add the following two lines:
define('WP_HOME','http://example.com');

define('WP_SITEURL','http://example.com');
An different option is to go to your phpMyAdmin again, click the database and then click the wp_options table. Then click ‘explore’ and change the first two URL’s into the correct values. Everything should be fine then. Please be careful and make a backup on forehand.
Using Plugins To Transfer WordPress: Dive Deeper with Our Guide
In our comprehensive post, we don’t just cover the manual steps to transfer WordPress to a new host. We also delve into the nuances of using WordPress migration plugins. These tools can greatly simplify the migration process, ensuring data integrity and reducing potential hiccups. Our guide discusses the best plugins in detail, their pros and cons, and how to effectively leverage them for a hassle-free site transfer. If you’re considering a plugin-assisted move, this section is an absolute must-read!
Migrate WordPress: too much hassle?
Despite our effort to explain how to transfer WordPress correctly, sometimes it might be easier to have it done for you. That’s why we offer Transfer.website. With this service it is possible to have the website moved for you automatically. That means all your files will be safe, all the databases are exported correctly and you will not need to change anything. Everything is done for you. This way you can migrate WordPress without too much hassle. Give it a try, right here

